


![[PRO Tips] Gold’s Bullish Revival: Seasonal Trends and Key Levels to Watch](https://xinker.org/uploads/images/202412/image_430x256_67724cc6ad0cd.webp)
![[PRO Tips] Gold Market Under Short-Term Pressure, Safe-Haven Demand and Central Bank Buying Support Long-Term Upside Potential](https://xinker.org/uploads/images/202412/image_430x256_676ffb4685287.webp)
![[PRO Tips] Analysis of 9 key points of differentiation strategy! Master differentiation to create a brand advantage that is unique in the world!](https://firebasestorage.googleapis.com/v0/b/xinker-tips.appspot.com/o/article_thumbnails%2Fscaled_differentiation%20strategy.png.png?alt=media&token=a1bfc3d2-e85a-4db7-8a6d-01c7274f8940)
![[PRO Tips] Will REITs regain growth momentum in 2024? 3 REITs ETFs you must know if you want to invest in real estate.](https://firebasestorage.googleapis.com/v0/b/xinker-tips.appspot.com/o/article_thumbnails%2Fscaled_REITs1.png.png?alt=media&token=8af4eb93-33ff-466f-8039-b6555fad52b4)
![[PRO Tips] Complete tutorial on how to make money in Adobe Stock!](https://firebasestorage.googleapis.com/v0/b/xinker-tips.appspot.com/o/article_thumbnails%2Fscaled_tut-adobe1.png.png?alt=media&token=0b2c8cf2-22bd-4142-883e-140ed1cbaf02)
![[Passive Income] Unlock the secret of passive income: 3 steps to apply for Google AdSense](https://xinker.org/uploads/images/202410/image_430x256_6717a4fb3052b.webp)
![[Passive Income] Earn over $200 a day with AI-generated articles!](https://firebasestorage.googleapis.com/v0/b/xinker-tips.appspot.com/o/article_thumbnails%2Fscaled_article1.png.png?alt=media&token=f61bf35b-8553-4719-826d-7360024adc70)
![[Passive Income] Earn over 20 USD per download with AI-generated images!](https://firebasestorage.googleapis.com/v0/b/xinker-tips.appspot.com/o/article_thumbnails%2Fscaled_adobe2.png.png?alt=media&token=3e20e76a-a907-45af-80aa-bf9b3600301f)
![[Passive Income] Earn 10 USD per new download by sharing CapCut!](https://firebasestorage.googleapis.com/v0/b/xinker-tips.appspot.com/o/article_thumbnails%2Fscaled_capcut2.png.png?alt=media&token=a04dec40-1fac-4857-86f2-19a8be02d38e)
![[Passive Income] Use your WiFi to create passive income in 5 minutes, and you can earn 4-6 U per day!](https://firebasestorage.googleapis.com/v0/b/xinker-tips.appspot.com/o/article_thumbnails%2Fscaled_Grassio.webp.png?alt=media&token=7659a95e-0e47-4f27-a17d-c942ac3cf7f4)


![[Business Talk] The Unique Theme of XINKER's Song: Beef Wellington and Business Mastery](https://xinker.org/uploads/images/202410/image_430x256_671afc155f47f.webp)
![[Business Talk] Chagee: Opening 3,500 stores in 6 years](https://xinker.org/uploads/images/202410/image_430x256_671afce80c5f9.webp)

How to complete Disruption in Warhammer 40K: Space Marine 2
Patch 12 has officially released in Warhammer 40K: Space Marine 2, and you can complete the Operation Disruption to enjoy the new update. The 12th operation takes place on Avarax, and the goal is to shore up the Cadian defense on the planet and prevent the Thousand Sons from being successful at the Ecclesiarchy Cathedral. The job can be slightly tricky, but this guide will inform you about what needs to be done.Table of contentsWarhammer 40K: Space Marine 2 Disruption Operation walkthroughReach the Cadian ForcesHold position until the gates are ready to closeDefend the generators from GargoylesRendezvous with the DreadnoughtAdvnace in the Deadnought's wakeFollow the Dreadnought to the CathedralProvide suppressive fire for the DreadnoughtGather and set the explosive chargesReturn to the DreadnoughtContain heretics until detonationWarhammer 40K: Space Marine 2 Disruption Operation walkthrough The Disruption operation can be broken down into the following parts.Reach the Cadian forcesHold position until the gates are ready to closeDefend the generators from GargoylesDefend the generators from swarming TyranidsRendezvous with the DreadnoughtAdvance in the Dreadnought's wakeFollow the Dreadnought to the CathedralProvide suppressive fire for the DreadnoughtChaos Barrier IntegrityEliminate the snipersGather and set explosive chargesReturn to the DreadnoughtContain heretics until detonationReach the Cadian Forces Image via Focus Interactive Once you've been briefed about the mission, reach the Cadians holding the ground while being surrounded by the enemies. Commander Otel will inform that they are being overrun by the Tyranid, and they will fall soon. You had to meet Major Kevar, but he is dead, and Otel is now leading the 22nd Company. Complete the short fight featuring the Thousand Sons and the Tyranids, and meet with teh Cadians. Thus begins your task of pushing through the Cathedral to reach the main army.Hold position until the gates are ready to close Image via Focus Interactive The next part involves ensuring that the Cathedral gates are shut to hold the sector. You'll face threats from incoming Tyranids who will target the power generators. Ideally, moving down will have made things easier, but you can't. You can only shoot from the top and try to get as many with your shots as you can. There can be potentially melee combat, as Tyranids will jump onto your ledge if they can get close enough. A second stage takes place involving the generators of the Zeta sector. Go east from the main generators and take the stairs to clear the small swarm of Tyranids. Once done, return to the main generators.Defend the generators from Gargoyles Once the Tyranids are dealt with, your next task is to defend the generator that's by teh main gate. Eliminate all the Gargoyles that are trying to attack it. Once done, you'll see the Cathedral Gates close. Until the gates are completely closed, you'll have to defend and hold your ground. The step ends with Commander Otel thanking you for your efforts.Rendezvous with the Dreadnought You'll now find out that a Redemptor Dreadnought is being deployed to help your cause against the Thousand Sons. Take the lift to go to your destination.Advnace in the Deadnought's wake Your next task is to complete the rendezvous with Valtus (the Redemptor Dreadnought) by going around the canal. You'llmeet a Helbrute on your way to Valtus. Thankfully, you'll find Cadian forces helping you to fight it (they don't much, but it's honest work). Once the Helbrute is dead, eliminate the remaining areas. Go to the structure, and clear all the enemies you can find in the area. You'll spot Brother Valtus in the next area, who is stuck on the other side. Help him out by defeating the enemies surrounding him, and proceed to the next assemble point.Follow the Dreadnought to the Cathedral Image via Focus Interactive For the next step, follow Valtus to the Cathedral. You'll meet different enemies fighting among themselves, but they will target you once you're spotted. Clear the enemies, and keep following the path to reach the underground passages. Eventually, you'll reach a room with another assemble area, and there begins your final part of the operation.Provide suppressive fire for the Dreadnought Your next job is to provide support to Valtus as he fights the arcane barrier. The Thousand Sons will have snipers who will target you. First, clear those long-range shooters. Next, try to focus on any of the remaining enemies since the Dreadnought's external armor is quite thick. Once the barrier gets destroyed by Valtus, make your way across the bridge and meet with him. At this point, you'll find a Heldrake that attempts to stop you. However, it will be shot by the Dreadnought, so don't worry.Gather and set the explosive charges Image via Focus Interactive Once the Heldrake is dead, you'll be contacted by Arch-Deacon Zoenia. She will inform you that she can't escape, and her support has been wiped out for the dark r

Patch 12 has officially released in Warhammer 40K: Space Marine 2, and you can complete the Operation Disruption to enjoy the new update.
The 12th operation takes place on Avarax, and the goal is to shore up the Cadian defense on the planet and prevent the Thousand Sons from being successful at the Ecclesiarchy Cathedral. The job can be slightly tricky, but this guide will inform you about what needs to be done.
Table of contents
Warhammer 40K: Space Marine 2 Disruption Operation walkthrough
The Disruption operation can be broken down into the following parts.- Reach the Cadian forces
- Hold position until the gates are ready to close
- Defend the generators from Gargoyles
- Defend the generators from swarming Tyranids
- Rendezvous with the Dreadnought
- Advance in the Dreadnought's wake
- Follow the Dreadnought to the Cathedral
- Provide suppressive fire for the Dreadnought
- Chaos Barrier Integrity
- Eliminate the snipers
- Gather and set explosive charges
- Return to the Dreadnought
- Contain heretics until detonation
Reach the Cadian Forces
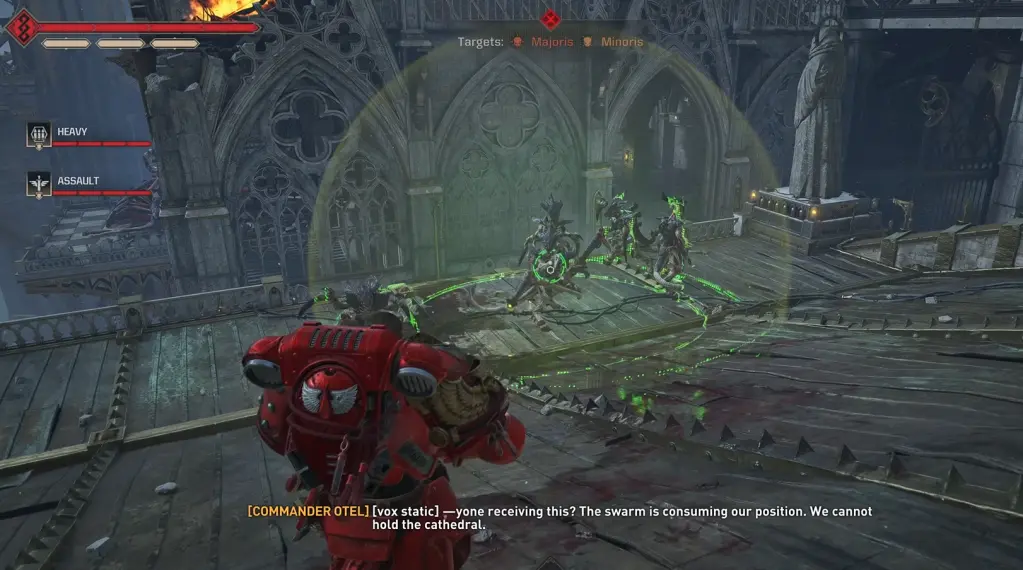 Image via Focus Interactive Once you've been briefed about the mission, reach the Cadians holding the ground while being surrounded by the enemies. Commander Otel will inform that they are being overrun by the Tyranid, and they will fall soon. You had to meet Major Kevar, but he is dead, and Otel is now leading the 22nd Company.
Complete the short fight featuring the Thousand Sons and the Tyranids, and meet with teh Cadians. Thus begins your task of pushing through the Cathedral to reach the main army.
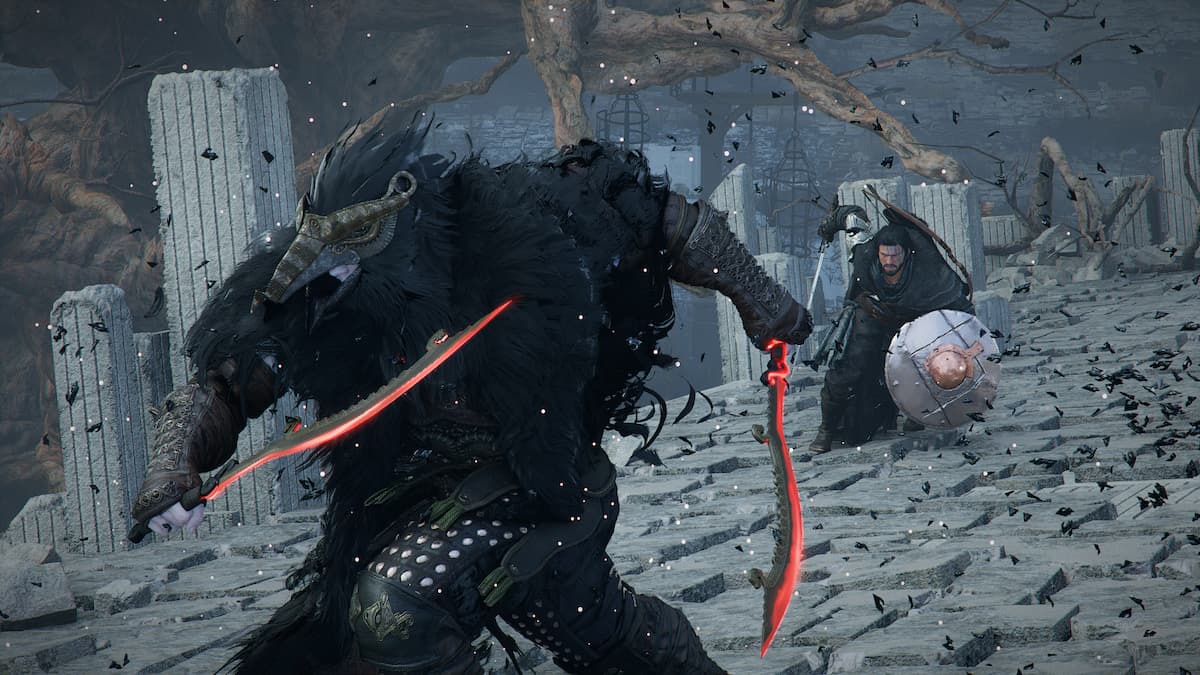
Hold position until the gates are ready to close
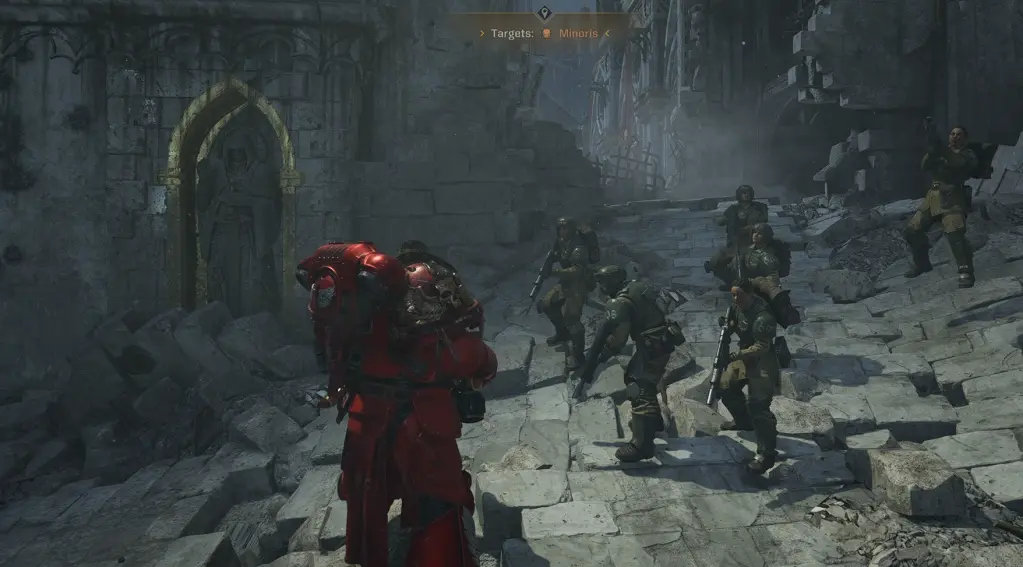 Image via Focus Interactive The next part involves ensuring that the Cathedral gates are shut to hold the sector. You'll face threats from incoming Tyranids who will target the power generators. Ideally, moving down will have made things easier, but you can't. You can only shoot from the top and try to get as many with your shots as you can. There can be potentially melee combat, as Tyranids will jump onto your ledge if they can get close enough.
A second stage takes place involving the generators of the Zeta sector. Go east from the main generators and take the stairs to clear the small swarm of Tyranids. Once done, return to the main generators.
Defend the generators from Gargoyles
Once the Tyranids are dealt with, your next task is to defend the generator that's by teh main gate. Eliminate all the Gargoyles that are trying to attack it. Once done, you'll see the Cathedral Gates close. Until the gates are completely closed, you'll have to defend and hold your ground. The step ends with Commander Otel thanking you for your efforts.Rendezvous with the Dreadnought
You'll now find out that a Redemptor Dreadnought is being deployed to help your cause against the Thousand Sons. Take the lift to go to your destination.Advnace in the Deadnought's wake
Your next task is to complete the rendezvous with Valtus (the Redemptor Dreadnought) by going around the canal. You'llmeet a Helbrute on your way to Valtus. Thankfully, you'll find Cadian forces helping you to fight it (they don't much, but it's honest work). Once the Helbrute is dead, eliminate the remaining areas. Go to the structure, and clear all the enemies you can find in the area.You'll spot Brother Valtus in the next area, who is stuck on the other side. Help him out by defeating the enemies surrounding him, and proceed to the next assemble point.
Follow the Dreadnought to the Cathedral
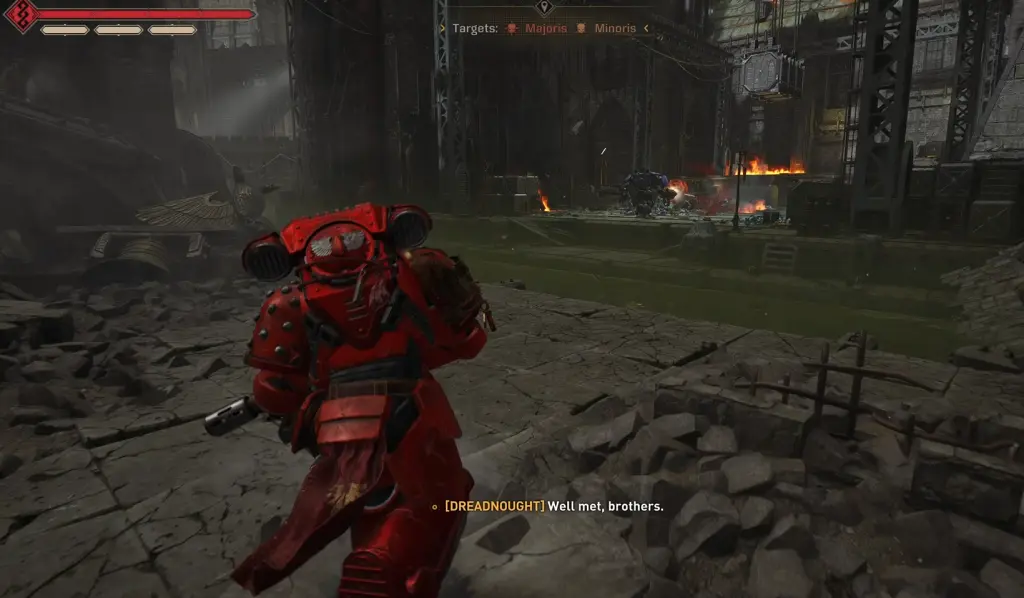 Image via Focus Interactive For the next step, follow Valtus to the Cathedral. You'll meet different enemies fighting among themselves, but they will target you once you're spotted. Clear the enemies, and keep following the path to reach the underground passages. Eventually, you'll reach a room with another assemble area, and there begins your final part of the operation.
Provide suppressive fire for the Dreadnought
Your next job is to provide support to Valtus as he fights the arcane barrier. The Thousand Sons will have snipers who will target you. First, clear those long-range shooters. Next, try to focus on any of the remaining enemies since the Dreadnought's external armor is quite thick.Once the barrier gets destroyed by Valtus, make your way across the bridge and meet with him. At this point, you'll find a Heldrake that attempts to stop you. However, it will be shot by the Dreadnought, so don't worry.
Gather and set the explosive charges
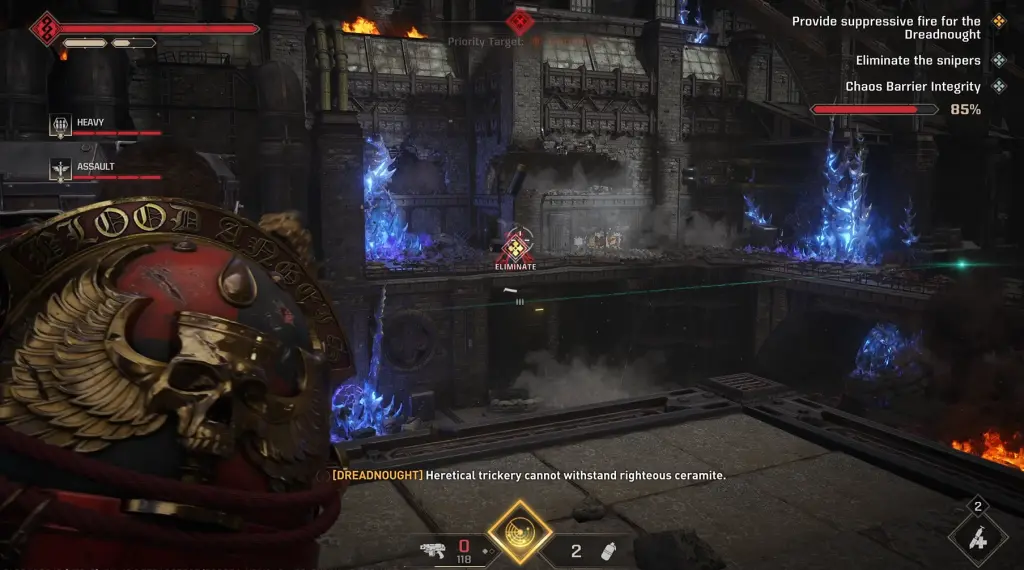 Image via Focus Interactive Once the Heldrake is dead, you'll be contacted by Arch-Deacon Zoenia. She will inform you that she can't escape, and her support has been wiped out for the dark ritual. Next, you'll find an open rift that's being used as a medium by the enemies.
First, gather explosives charges from the nearby fallen soldiers. Then, follow the directives and place the explosives. Place the explosives on the pillar next to the rift and on the pillar rights above it. You can use the objective markers, so don't worry too much. Expect to find attackers, however, as you attempt to plant the explosives.
Return to the Dreadnought
After the explosives are set, advance to the Egress Point before the Cathedral crumbles. Valtus will instruct Zoenia to follow him, but she will choose to stay back and offer prayers in the Cathedral before it is destroyed.Contain heretics until detonation
The final part of the task is quite simple, as you'll have to defend your ground until the explosives detonate. Shoot the heretics that are within the Cathedral to prevent them from coming outside. Wait for the countdown to appear on the top-right-hand side of your screen.Hold your ground until the countdown runs out, and a cutscene will play out about the destruction of the rift gate, followed by teh Cathedral. This will complete the Disruption operation.
The post How to complete Disruption in Warhammer 40K: Space Marine 2 appeared first on Destructoid.
What's Your Reaction?


XINKER - Business and Income Tips
Explore XINKER, the ultimate platform for mastering business strategies, discovering passive income opportunities, and learning success principles. Join a community of thinkers dedicated to achieving financial freedom and entrepreneurial excellence.