
![[PRO Tips] Gold’s Bullish Revival: Seasonal Trends and Key Levels to Watch](https://xinker.org/uploads/images/202412/image_430x256_67724cc6ad0cd.webp)
![[PRO Tips] Gold Market Under Short-Term Pressure, Safe-Haven Demand and Central Bank Buying Support Long-Term Upside Potential](https://xinker.org/uploads/images/202412/image_430x256_676ffb4685287.webp)
![[PRO Tips] Analysis of 9 key points of differentiation strategy! Master differentiation to create a brand advantage that is unique in the world!](https://firebasestorage.googleapis.com/v0/b/xinker-tips.appspot.com/o/article_thumbnails%2Fscaled_differentiation%20strategy.png.png?alt=media&token=a1bfc3d2-e85a-4db7-8a6d-01c7274f8940)
![[PRO Tips] Will REITs regain growth momentum in 2024? 3 REITs ETFs you must know if you want to invest in real estate.](https://firebasestorage.googleapis.com/v0/b/xinker-tips.appspot.com/o/article_thumbnails%2Fscaled_REITs1.png.png?alt=media&token=8af4eb93-33ff-466f-8039-b6555fad52b4)
![[PRO Tips] Complete tutorial on how to make money in Adobe Stock!](https://firebasestorage.googleapis.com/v0/b/xinker-tips.appspot.com/o/article_thumbnails%2Fscaled_tut-adobe1.png.png?alt=media&token=0b2c8cf2-22bd-4142-883e-140ed1cbaf02)
![[Passive Income] Unlock the secret of passive income: 3 steps to apply for Google AdSense](https://xinker.org/uploads/images/202410/image_430x256_6717a4fb3052b.webp)
![[Passive Income] Earn over $200 a day with AI-generated articles!](https://firebasestorage.googleapis.com/v0/b/xinker-tips.appspot.com/o/article_thumbnails%2Fscaled_article1.png.png?alt=media&token=f61bf35b-8553-4719-826d-7360024adc70)
![[Passive Income] Earn over 20 USD per download with AI-generated images!](https://firebasestorage.googleapis.com/v0/b/xinker-tips.appspot.com/o/article_thumbnails%2Fscaled_adobe2.png.png?alt=media&token=3e20e76a-a907-45af-80aa-bf9b3600301f)
![[Passive Income] Earn 10 USD per new download by sharing CapCut!](https://firebasestorage.googleapis.com/v0/b/xinker-tips.appspot.com/o/article_thumbnails%2Fscaled_capcut2.png.png?alt=media&token=a04dec40-1fac-4857-86f2-19a8be02d38e)
![[Passive Income] Use your WiFi to create passive income in 5 minutes, and you can earn 4-6 U per day!](https://firebasestorage.googleapis.com/v0/b/xinker-tips.appspot.com/o/article_thumbnails%2Fscaled_Grassio.webp.png?alt=media&token=7659a95e-0e47-4f27-a17d-c942ac3cf7f4)


![[Business Talk] The Unique Theme of XINKER's Song: Beef Wellington and Business Mastery](https://xinker.org/uploads/images/202410/image_430x256_671afc155f47f.webp)
![[Business Talk] Chagee: Opening 3,500 stores in 6 years](https://xinker.org/uploads/images/202410/image_430x256_671afce80c5f9.webp)
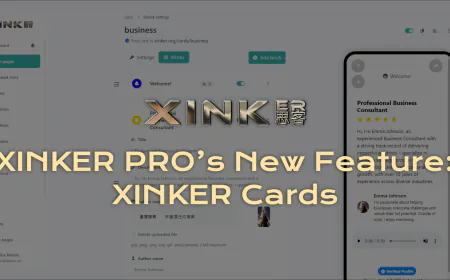

Assassin's Creed: Black Flag Resynced - Combat System Breakdown
Assassin's Creed: Black Flag Resynced - Combat System BreakdownWith launch just around the corner, we dive deeper into the specificities of Assassin’s Creed Black Flag Resynced’s combat system, sharing a few tips & tricks to make the most out of each fight!Ahoy! As the launch of Resynced is upon us, we want to dive deeper into the nuts and bolts of our combat system, while providing you with a few tips & tricks to make the most out of your upcoming fights!The combat system in Resynced has been rebuilt from the ground up to deliver the kind of swashbuckling experience the Golden Age of Piracy deserves — raw, rhythmic, and ruthlessly satisfying.Let’s dive in.COMBAT BASICSTakedownsAt the heart of Resynced’s combat system is a simple foundation that rewards players’ skill and decision-making: TAKEDOWNS. This is a state where enemies are vulnerable to a deadly finisher.How does it work? Every opponent in the game carries a defense bar. Chipping away at this through basic attacks or special moves will lead to a takedown opportunity - a brutal, cinematic finishing move that can be chained across multiple opponents in rapid succession, turning a brawl into a spectacle.Top Tip: Takedowns are especially helpful at quickly resolving a fight when you are slightly too close to desynchronization or overwhelmed by enemy numbers.There are many ways to trigger a takedown, each suited to different situations:Hidden Blade Takedown: Breaking an enemy’s defense with multiple attacks, or by using a pistol quickshot, opens an enemy up for a Hidden Blade Takedown. Quick-use the Rope Dart on an enemy performing a ranged attack to break their defense immediately. If an enemy is too far away, dodge towards an enemy before using the Hidden Blade.Chain Takedown: Perfect Parry opens up an enemy for a Takedown. Edward can then chain takedown up to four enemies, depending on his sword.Advanced Chain Takedown: Advanced enemies such as the Brute or the Captain will deny your Chain Takedown. Quickfire a pistol in between your Chains to break their defense to carry on the Chain. Inspired by the original's combo videos, this can be hard to pull off, but very satisfying.Wall Takedown: Kick an enemy into a wall or a ship railing to open them up for a fatal Wall Takedown.These takedowns will see Edward wielding his sword, pistols or Hidden Blade to quickly eliminate foes – with his signature Pirate Assassin flair.Top Tip: Be mindful of your environment, because this can have a big effect on fights. Ledges allow fatal kicks, tight corridors are ideal for Chain Takedowns, powder kegs can be blown up to drop enemies for a Ground Takedown, and walls are killing surfaces which allow Edward to perform Wall Takedowns after a well-placed kick.Now let’s see how we can trigger these takedowns.OFFENSIVE MOVESETSOnce you're in a fight, you have a few core offensive tools to strike on your enemies:Basic Attacks are your bread-and-butter multi-hit combo, quite effective against basic archetypes. Basic attacks reduce enemy defense. Lean on them too heavily though, and enemies will adapt and start blocking — requiring you to move to a different approach.Top Tip: Press R3 to lock on an enemy, using R to cycle through targets. A useful tool when surrounded!Heavy Strikes hit harder and break defenses more reliably, though tougher archetypes can still absorb them. The exact move of the Heavy attack varies depending on the sword you have equipped, more on that just below!Top Tip: Heavy Strikes are useful at the end of attack combos, or after a dodge attack.The Kick is a crowd control tool more than a damage dealer. It staggers enemies and creates space.Top Tip: Boot someone into a wall for a direct Wall Takedown opportunity. Near a ledge? Kick them off in “This is… The Caribbean” style!The Sweep is the perfect answer when an enemy keeps blocking your attacks. If landed perfectly, it instantly breaks their defense, throws them to the ground and opens them up for a ground takedown.SWORD TYPESIn Resynced, there are 3 types of swords:Rapier: Heavy Strikes pierce through foes, making it ideal for focused, precise attacks.Cutlass: Heavy Strikes sweep a wide area, perfect for hitting multiple enemies at once and crowd control.Pistol-Sword: Fires two shots on a Heavy Attack, letting you concentrate damage on one target or split it across two.Top Tip: Be mindful of each sword’s distinct Heavy Attack move. These can greatly affect the fight. You can choose your weapon to suit your playstyle and/or the situation at hand.DEFENSIVE OPTIONSStaying alive is just as important as dealing damage, and Edward’s defensive moves can equally turn a fight in your favor.Parry: A standard parry is useful to stun an enemy while draining a large amount of defense. Landing a Perfect Parry opens up Takedowns and Chain Takedowns directly. Parrying is a high-risk, high reward move. Always be ready for a Perfect Parry into a Chain Takedown, but if you miss, immediately react with a combo.Dodge is th
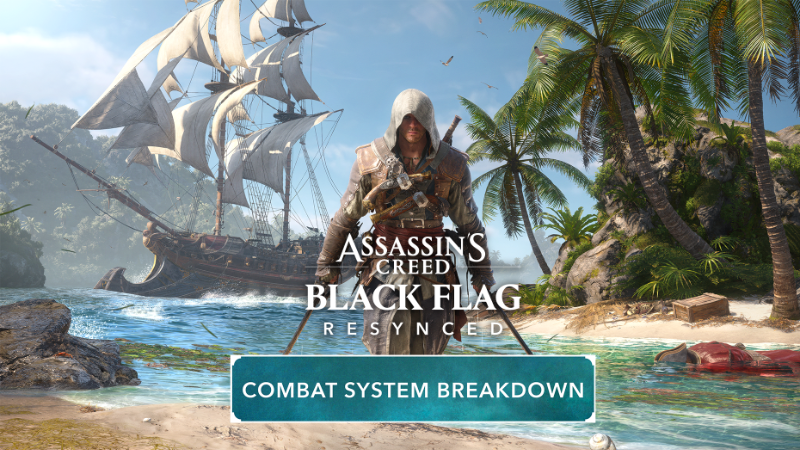

With launch just around the corner, we dive deeper into the specificities of Assassin’s Creed Black Flag Resynced’s combat system, sharing a few tips & tricks to make the most out of each fight!
Ahoy! As the launch of Resynced is upon us, we want to dive deeper into the nuts and bolts of our combat system, while providing you with a few tips & tricks to make the most out of your upcoming fights!
The combat system in Resynced has been rebuilt from the ground up to deliver the kind of swashbuckling experience the Golden Age of Piracy deserves — raw, rhythmic, and ruthlessly satisfying.
Let’s dive in.
At the heart of Resynced’s combat system is a simple foundation that rewards players’ skill and decision-making: TAKEDOWNS. This is a state where enemies are vulnerable to a deadly finisher.
How does it work? Every opponent in the game carries a defense bar. Chipping away at this through basic attacks or special moves will lead to a takedown opportunity - a brutal, cinematic finishing move that can be chained across multiple opponents in rapid succession, turning a brawl into a spectacle.

Top Tip: Takedowns are especially helpful at quickly resolving a fight when you are slightly too close to desynchronization or overwhelmed by enemy numbers.
There are many ways to trigger a takedown, each suited to different situations:
Hidden Blade Takedown: Breaking an enemy’s defense with multiple attacks, or by using a pistol quickshot, opens an enemy up for a Hidden Blade Takedown. Quick-use the Rope Dart on an enemy performing a ranged attack to break their defense immediately. If an enemy is too far away, dodge towards an enemy before using the Hidden Blade.
Chain Takedown: Perfect Parry opens up an enemy for a Takedown. Edward can then chain takedown up to four enemies, depending on his sword.
Advanced Chain Takedown: Advanced enemies such as the Brute or the Captain will deny your Chain Takedown. Quickfire a pistol in between your Chains to break their defense to carry on the Chain. Inspired by the original's combo videos, this can be hard to pull off, but very satisfying.
Wall Takedown: Kick an enemy into a wall or a ship railing to open them up for a fatal Wall Takedown.
These takedowns will see Edward wielding his sword, pistols or Hidden Blade to quickly eliminate foes – with his signature Pirate Assassin flair.
Top Tip: Be mindful of your environment, because this can have a big effect on fights. Ledges allow fatal kicks, tight corridors are ideal for Chain Takedowns, powder kegs can be blown up to drop enemies for a Ground Takedown, and walls are killing surfaces which allow Edward to perform Wall Takedowns after a well-placed kick.
Now let’s see how we can trigger these takedowns.
Once you're in a fight, you have a few core offensive tools to strike on your enemies:
Basic Attacks are your bread-and-butter multi-hit combo, quite effective against basic archetypes. Basic attacks reduce enemy defense. Lean on them too heavily though, and enemies will adapt and start blocking — requiring you to move to a different approach.
Top Tip: Press R3 to lock on an enemy, using R to cycle through targets. A useful tool when surrounded!
Heavy Strikes hit harder and break defenses more reliably, though tougher archetypes can still absorb them. The exact move of the Heavy attack varies depending on the sword you have equipped, more on that just below!
Top Tip: Heavy Strikes are useful at the end of attack combos, or after a dodge attack.
The Kick is a crowd control tool more than a damage dealer. It staggers enemies and creates space.
Top Tip: Boot someone into a wall for a direct Wall Takedown opportunity. Near a ledge? Kick them off in “This is… The Caribbean” style!
The Sweep is the perfect answer when an enemy keeps blocking your attacks. If landed perfectly, it instantly breaks their defense, throws them to the ground and opens them up for a ground takedown.
In Resynced, there are 3 types of swords:
Rapier: Heavy Strikes pierce through foes, making it ideal for focused, precise attacks.

Cutlass: Heavy Strikes sweep a wide area, perfect for hitting multiple enemies at once and crowd control.

Pistol-Sword: Fires two shots on a Heavy Attack, letting you concentrate damage on one target or split it across two.

Top Tip: Be mindful of each sword’s distinct Heavy Attack move. These can greatly affect the fight. You can choose your weapon to suit your playstyle and/or the situation at hand.
Staying alive is just as important as dealing damage, and Edward’s defensive moves can equally turn a fight in your favor.
Parry: A standard parry is useful to stun an enemy while draining a large amount of defense. Landing a Perfect Parry opens up Takedowns and Chain Takedowns directly. Parrying is a high-risk, high reward move. Always be ready for a Perfect Parry into a Chain Takedown, but if you miss, immediately react with a combo.
Dodge is the safer choice — especially against un-parryable attacks. Dodge just before an enemies’ attack hits you for a Perfect Dodge, then press R1 for a special attack that inflicts 3X damage. You will know you performed a Perfect Dodge Attack when you see its signature motion blur and hear a whistling blade.
Top Tip: Press dodge twice to regain more distance from your opponent(s).
Vault allows you to jump on an enemy and roll over them to strike again. It keeps Edward mobile and prevents him from getting cornered. It's the best tool for repositioning when surrounded.
Top Tip: Enemies are smarter in Resynced. If you try the same move multiple times in a row, they will adapt and force you to reconsider your approach!
This is why quickly adapting in a fight is KEY. And why advanced tools can be useful to end a fight.
Let’s look at what additional tools and moves Edward has in his repertoire!
Rope Dart: Pulls enemies in from range, interrupts incoming attacks, and can yank enemies down from rooftops. To make it a central part of Edward's kit from the start, you'll get your hands on it much earlier than in the original — Sequence 3 rather than Sequence 11. Remember that a Rope Dart counters enemy ranged attacks - even bosses. This breaks their defence immediately, pulls them in, opening them up for a Hidden Blade Takedown, or a combo of your choice.
Quick Shot: Pistols are integral to the pirate fantasy, and in Resynced they earn their place in the moment-to-moment flow of combat. A quick shot instantly breaks the guard of any advanced archetype, opening them up for attacks they'd otherwise deny and allowing you to continue your chain.
Gun Kata: A four-shot combo that instantly eliminates basic archetypes and staggers advanced ones. Particularly useful when swarmed or when an alarm bell needs silencing fast. You'll need to upgrade your pistols to carry up to four.
Human Shield: The perfect counter to ranged threats. Grab a nearby enemy at the right moment and use them to absorb an incoming shot.
Advanced enemy archetypes will require a bit more creativity to take down.
Soldiers are the most common guard you'll encounter. They can block a handful of Edward's attacks, but their defense is easy to break. Once you've pushed through it, they go down quickly with chained takedowns.
Fast, dagger-wielding, and genuinely disruptive. Agiles dodge your attacks\[DS9.1], vault over you when cornered, parry your counters, and hit back before you've recovered. If they're chasing Edward down, they can tackle him to the ground. Fights against them require a different mindset — you have to slow down, read them, and wait for your opening instead of just pressing forward.
The Brute is the archetype that makes you reconsider your approach before you've even thrown a punch. Slow but nearly immovable, they absorb punishment without flinching. The critical detail: their attacks cannot be parried. Dodging is the only answer - and that's exactly what they're designed to teach you. Brutes can also lob grenades at you, so stay aware of your surroundings when a Brute is at range.
Quick Shots from Edward’s pistol are highly recommended to break their defence and perform a takedown, or simply to continue your ongoing chained takedowns.
Gunners add verticality to a fight. Sharp-eyed and positioned up high, they're hard to reach while you're engaged at ground level. The standout interaction is the human shield mechanic — grab a nearby enemy at just the right moment as the Gunner lines up their shot, and you can turn their attack against their allies with the HUMAN SHIELD.
Captains are the most well-rounded threat you'll encounter — and probably the most dangerous because of it.
They wield both sword and pistol and can block, dodge, and parry Edward's attacks. Some of their combos have openings — but push too aggressively and they'll end the exchange with a point-blank pistol shot that forces you to break off. Every fight with a Captain is an intense back-and-forth.
The Demolitionist is a brand new enemy type from the original and one built entirely around disrupting your comfort zone . Armed with a blunderbuss that sprays fire damage in a wide cone, getting too close is dangerous.
Staying back isn't safe either — they'll lob grenades to flush you out and keep you moving. The Demolitionist is a fight manager. Their entire kit is designed to deny you the position you've found and force you to keep adapting.
The game also features a bunch of new boss fights that we cannot spoil. However, we CAN say that some of your targets will become boss fight challenges if you fail to assassinate them sneakily.
Enemies in Resynced react to repetitive behavior. If you kick too often, for example, enemies will adapt and dodge or counter you. Vary your attacks and combos to confuse enemies. Rotate your tool use. Alternate between a parrying defensive strategy with perfect dodge attacks. Use the Rope Dart as a ranged attack counter. Mastering variation and combos will help Edward avoid incoming damage efficiently.
Enemies may also attack you during your combos or your Takedowns if you do not vary your offensive strategy. Always watch out for an incoming attack. Keep the parry or dodge button at the tip of your mental stack to become a true swashbuckling pirate.
Now that you know the basics, it's time to put them together — and start finding out what you can really get away with.
The combat system in Resynced rewards players who keep their opponents guessing. Land a few sword strikes to wear down their defense, then draw your pistol and free-aim a shot straight at a Brute's head.
Yank a Soldier into their own grenade with the Rope Dart. Or end a fight in seconds with a Gun Kata into a flurry of Pistol-Sword shots. The toolkit is there — how you use it is up to you.
The team can't wait to see what you come up with. Share your best combat clips with us using #AssassinsCreed and join the official Discord server to share your combat tips with the rest of the Community.
What's Your Reaction?









![[Business Talk] Chagee: Opening 3,500 stores in 6 years](https://xinker.org/uploads/images/202410/image_140x98_671afce94bf91.webp)