


![[PRO Tips] Gold’s Bullish Revival: Seasonal Trends and Key Levels to Watch](https://xinker.org/uploads/images/202412/image_430x256_67724cc6ad0cd.webp)
![[PRO Tips] Gold Market Under Short-Term Pressure, Safe-Haven Demand and Central Bank Buying Support Long-Term Upside Potential](https://xinker.org/uploads/images/202412/image_430x256_676ffb4685287.webp)
![[PRO Tips] Analysis of 9 key points of differentiation strategy! Master differentiation to create a brand advantage that is unique in the world!](https://firebasestorage.googleapis.com/v0/b/xinker-tips.appspot.com/o/article_thumbnails%2Fscaled_differentiation%20strategy.png.png?alt=media&token=a1bfc3d2-e85a-4db7-8a6d-01c7274f8940)
![[PRO Tips] Will REITs regain growth momentum in 2024? 3 REITs ETFs you must know if you want to invest in real estate.](https://firebasestorage.googleapis.com/v0/b/xinker-tips.appspot.com/o/article_thumbnails%2Fscaled_REITs1.png.png?alt=media&token=8af4eb93-33ff-466f-8039-b6555fad52b4)
![[PRO Tips] Complete tutorial on how to make money in Adobe Stock!](https://firebasestorage.googleapis.com/v0/b/xinker-tips.appspot.com/o/article_thumbnails%2Fscaled_tut-adobe1.png.png?alt=media&token=0b2c8cf2-22bd-4142-883e-140ed1cbaf02)
![[Passive Income] Unlock the secret of passive income: 3 steps to apply for Google AdSense](https://xinker.org/uploads/images/202410/image_430x256_6717a4fb3052b.webp)
![[Passive Income] Earn over $200 a day with AI-generated articles!](https://firebasestorage.googleapis.com/v0/b/xinker-tips.appspot.com/o/article_thumbnails%2Fscaled_article1.png.png?alt=media&token=f61bf35b-8553-4719-826d-7360024adc70)
![[Passive Income] Earn over 20 USD per download with AI-generated images!](https://firebasestorage.googleapis.com/v0/b/xinker-tips.appspot.com/o/article_thumbnails%2Fscaled_adobe2.png.png?alt=media&token=3e20e76a-a907-45af-80aa-bf9b3600301f)
![[Passive Income] Earn 10 USD per new download by sharing CapCut!](https://firebasestorage.googleapis.com/v0/b/xinker-tips.appspot.com/o/article_thumbnails%2Fscaled_capcut2.png.png?alt=media&token=a04dec40-1fac-4857-86f2-19a8be02d38e)
![[Passive Income] Use your WiFi to create passive income in 5 minutes, and you can earn 4-6 U per day!](https://firebasestorage.googleapis.com/v0/b/xinker-tips.appspot.com/o/article_thumbnails%2Fscaled_Grassio.webp.png?alt=media&token=7659a95e-0e47-4f27-a17d-c942ac3cf7f4)


![[Business Talk] The Unique Theme of XINKER's Song: Beef Wellington and Business Mastery](https://xinker.org/uploads/images/202410/image_430x256_671afc155f47f.webp)
![[Business Talk] Chagee: Opening 3,500 stores in 6 years](https://xinker.org/uploads/images/202410/image_430x256_671afce80c5f9.webp)

All Tadpole upgrade locations in Subnautica 2 and how to find them
The Tadpole is your best friend when it comes to deep-sea exploration in Subnautica 2, and we can improve it with some extremely useful upgrades. The upgrades come in different shapes and sizes, but they all improve your submarine in one way or another. You'll have to find all the upgrade modules manually, and this guide is here to help you out.How to find all Tadpode upgrades in Subnautica 2 Before I dive deep, you should note that there's no fixed way to find these upgrade modules. My sequence is the most optimum one, and you'll save a lot of time.Scout Ray Chassis location Screenshot by Destructoid This is the only upgrade module that's not located around the Alien Ruins Research Outpost. Instead, you'll need to head to the Tadpole Pens in the warm area of the ocean. Head inside, and continue on the straight path. You'll find the Scout Ray in the Moonpool; scan with your scanner, and we are done. Screenshot by Destructoid I highly recommend upgrading to the Scout Ray if you've th resources. This chassis gives a huge speed bump to your Tadpole, and it will help save a lot of time during the next steps.Engine Efficiency Screenshot by Destructoid Head east from your Lifepod and you'll find the Alien Ruins Research Outpost at approximately 1300m. Head inside, and turn right. You'll find the Engine Efficiency upgrade module.Strike Armor Screenshot by Destructoid From the Research Outpost, travel between 195 and 210 degrees on the compass. You should aim for a depth of approximately 190m (go gradually instead of taking a sharp dive). Screenshot by Destructoid You'll find the platform with the Strike Armor upgrade at around 60m from the outpost.Cavitation Muffler upgrade location Screenshot by Destructoid This is the furthest upgrade module to find. Return to the front of the outpost. Head to deeper depths while aiming at around 75 degrees east on the compass. You'll come across the above structure in the image (this is the Power Center). Go past the arc shown in the picture, and then past the pillar. Screenshot by Destructoid The screen will become greener, and you'll find a set of colorful alien plants to your right. Keep to your left, and keep going deeper targetting around 350m of depth. At around 370m of depth, you'll find a platform on the edge of the cliff on the left (it's extremely close to the early access area boundary). Here, you'll find the Cavitation Muffler upgrade. You should return to the Outpost after obtaining this module.Photovoltaic Charger upgrade location Screenshot by Destructoid Head towards 120 degrees on the compass from the outpost. You'll find the Blackbox - Iso marker that you should use as your guide. Keep a steady depth of 120m and head straight. You'll come across an Alterra starship wreck. Park your Tadpole and head inside using the door on the left. Screenshot by Destructoid Head straight, turn right, and you'll find a broken door. Repair the door, and head inside. Then turn left and go to the next room. Take the door to the left corner, and you'll come across the room with the ISO. The module is diagonally opposite to the dining table that has the ISO on it.Depth Module Mk. I upgrade location Screenshot by Destructoid Return to the front of the Research Outpost. Aim at 165 degrees on the compass, and you'll find the Blackbox - Ruby 2 pop up on your screen. Head to the spot and reach the bottom layer of the location. You can enter through the broken rocks; I entered through a narrow spot on the left (leave your Tadpole), and you'll find Ruby 2's black box. Screenshot by Destructoid You'll also find a broken-down Tadpole, with the Depth Module Mk. 1 beside it.Haul Chassis upgrade locations To get the Haul Chassis, you'll need to scan three fragments. The first one is located just by the Depth Module Mk. 1 upgrade. Once done, return to the Research Outpost and head straight targeting between East and 105 degrees on the compass. Screenshot by Destructoid Go past the dome of the Power Center (stick strictly to 105 degrees now), and head straight. Keep heading straight, and you'll reach another Alterra shipwreck at about 200m depth. Screenshot by Destructoid The second Haul Chassis part is on a platform to the left. Screenshot by Destructoid To find the final one, you can refer to this guide, which states the location of the final Angel Comb. You'll want to go past the Angel Comb and head straight, following the root until you reach an acidic pool. Screenshot by Destructoid Look to your left past the alien structures after entering the pool room, and you'll find your final chassis part. Screenshot by Destructoid Complete the scan, and your Tadpole will now be able to equip the Haul Chassis. The post All Tadpole upgrade locations in Subnautica 2 and how to find them appeared first on Destructoid.
The Tadpole is your best friend when it comes to deep-sea exploration in Subnautica 2, and we can improve it with some extremely useful upgrades. The upgrades come in different shapes and sizes, but they all improve your submarine in one way or another.
You'll have to find all the upgrade modules manually, and this guide is here to help you out.
How to find all Tadpode upgrades in Subnautica 2
Before I dive deep, you should note that there's no fixed way to find these upgrade modules. My sequence is the most optimum one, and you'll save a lot of time.Scout Ray Chassis location
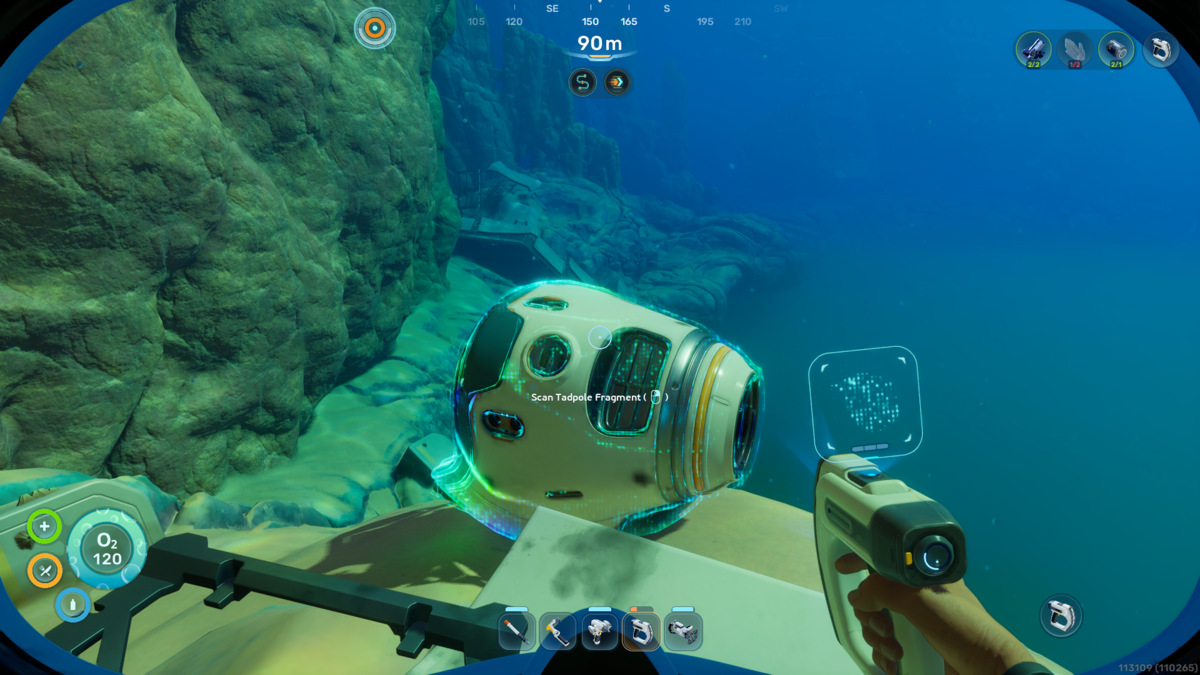
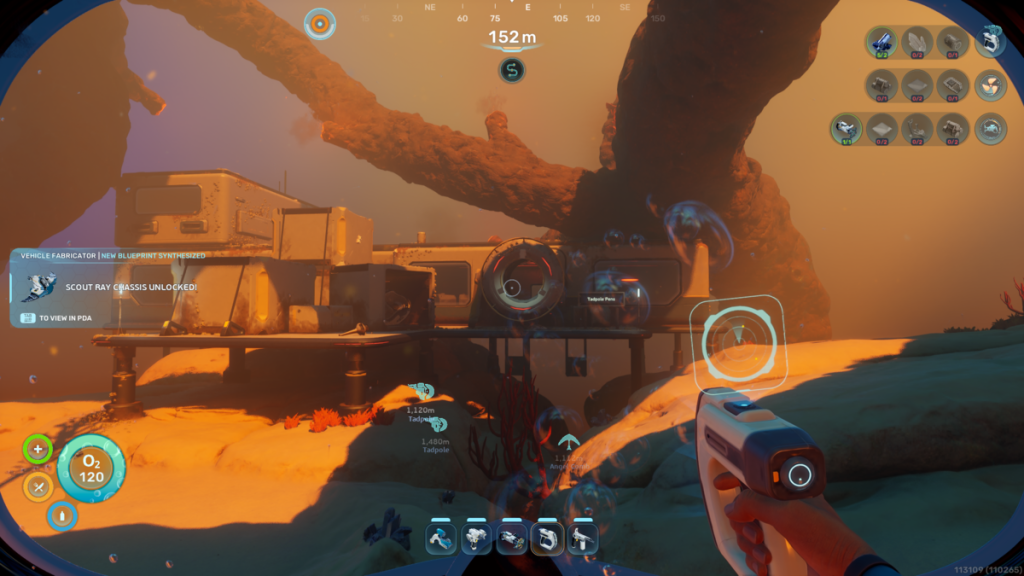 Screenshot by Destructoid This is the only upgrade module that's not located around the Alien Ruins Research Outpost. Instead, you'll need to head to the Tadpole Pens in the warm area of the ocean. Head inside, and continue on the straight path. You'll find the Scout Ray in the Moonpool; scan with your scanner, and we are done.
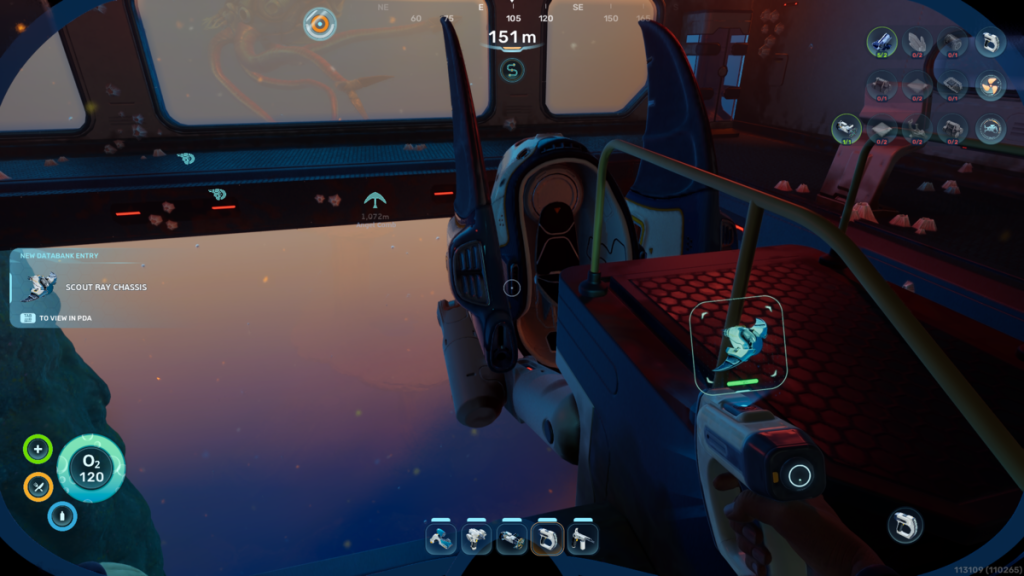 Screenshot by Destructoid I highly recommend upgrading to the Scout Ray if you've th resources. This chassis gives a huge speed bump to your Tadpole, and it will help save a lot of time during the next steps.
Engine Efficiency
 Screenshot by Destructoid Head east from your Lifepod and you'll find the Alien Ruins Research Outpost at approximately 1300m. Head inside, and turn right. You'll find the Engine Efficiency upgrade module.
Strike Armor
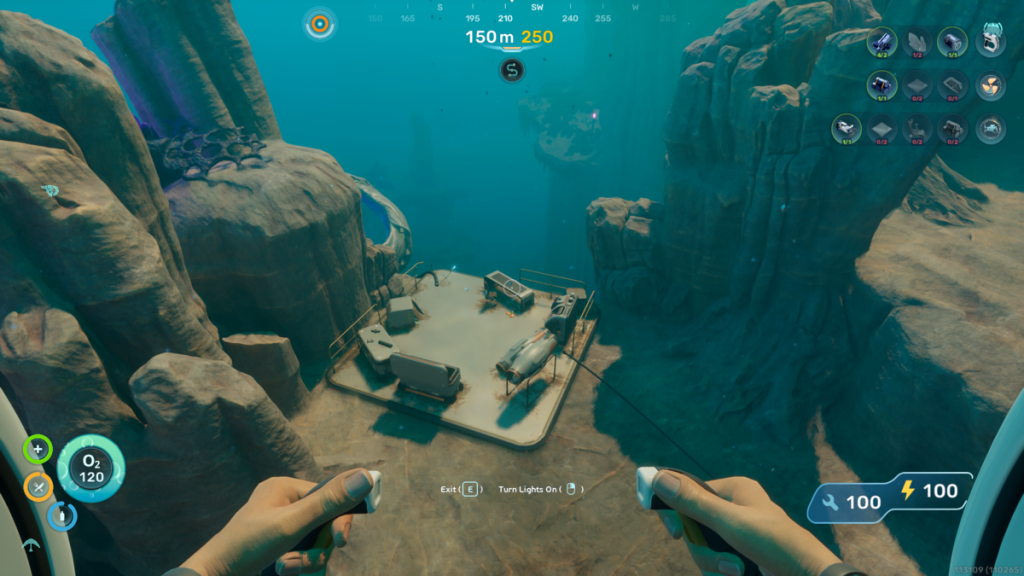 Screenshot by Destructoid From the Research Outpost, travel between 195 and 210 degrees on the compass. You should aim for a depth of approximately 190m (go gradually instead of taking a sharp dive).
 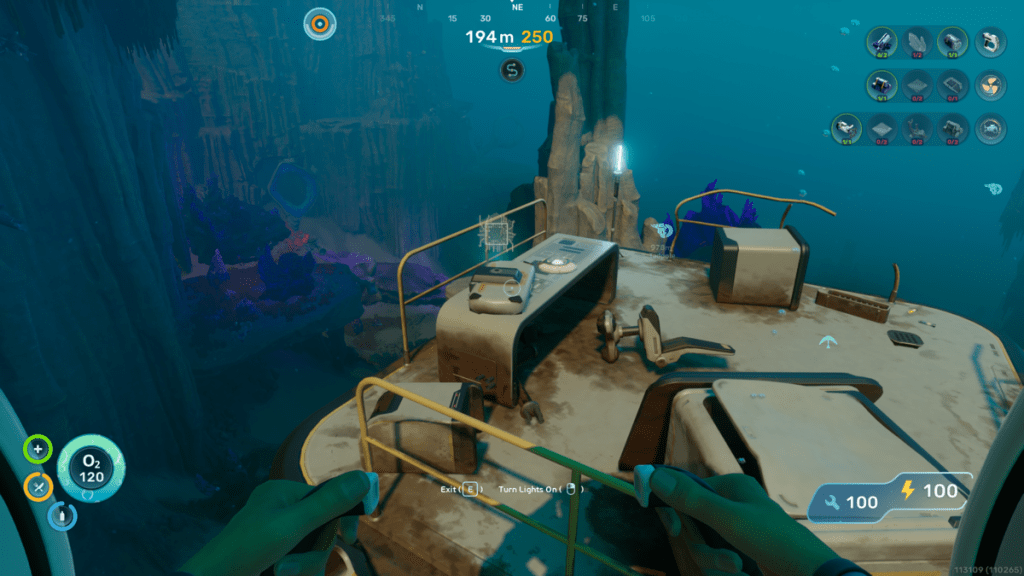 Screenshot by Destructoid You'll find the platform with the Strike Armor upgrade at around 60m from the outpost.
Cavitation Muffler upgrade location
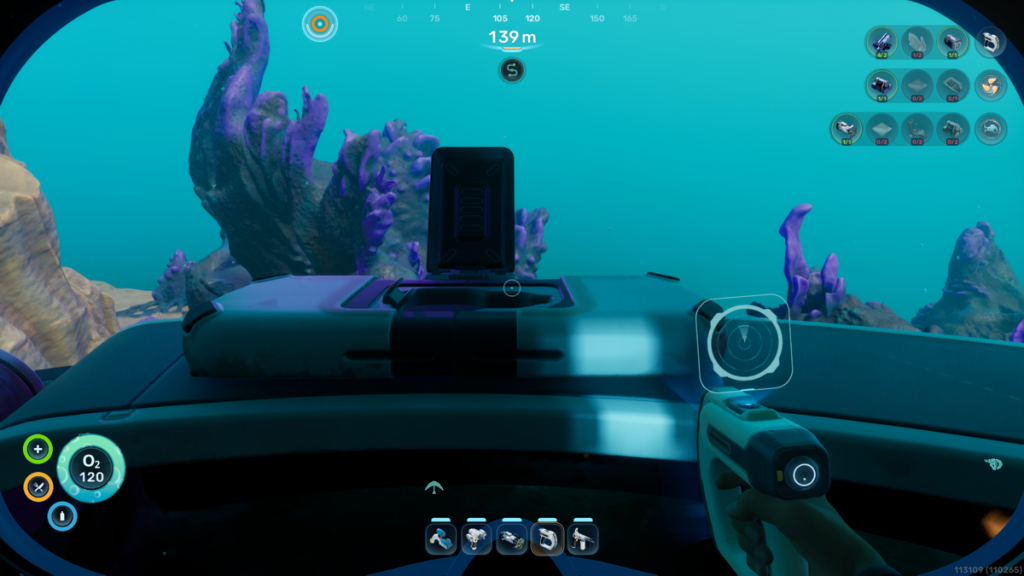
 Screenshot by Destructoid This is the furthest upgrade module to find. Return to the front of the outpost. Head to deeper depths while aiming at around 75 degrees east on the compass. You'll come across the above structure in the image (this is the Power Center). Go past the arc shown in the picture, and then past the pillar.
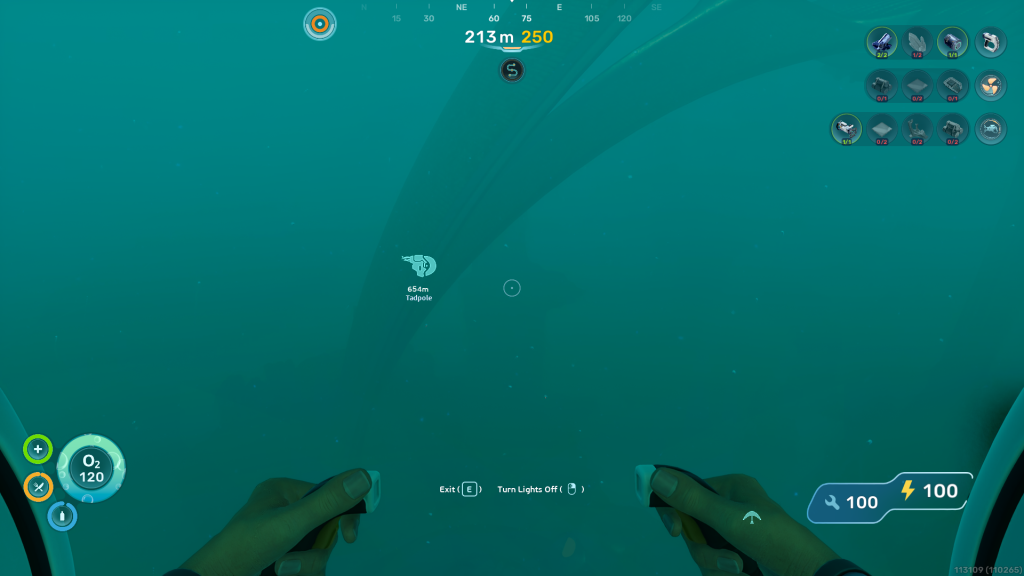
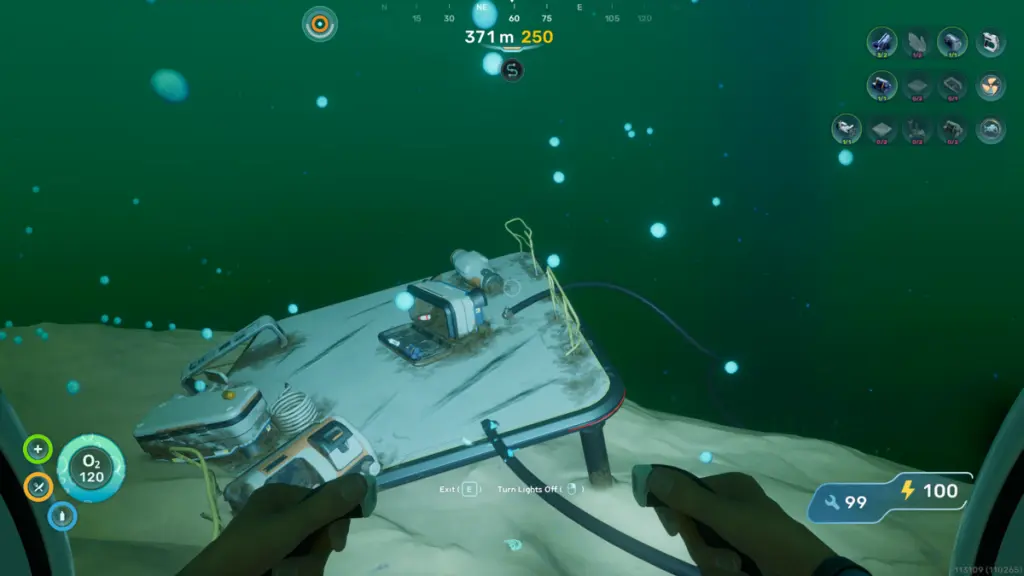 Screenshot by Destructoid The screen will become greener, and you'll find a set of colorful alien plants to your right. Keep to your left, and keep going deeper targetting around 350m of depth. At around 370m of depth, you'll find a platform on the edge of the cliff on the left (it's extremely close to the early access area boundary).
Here, you'll find the Cavitation Muffler upgrade. You should return to the Outpost after obtaining this module.
Photovoltaic Charger upgrade location
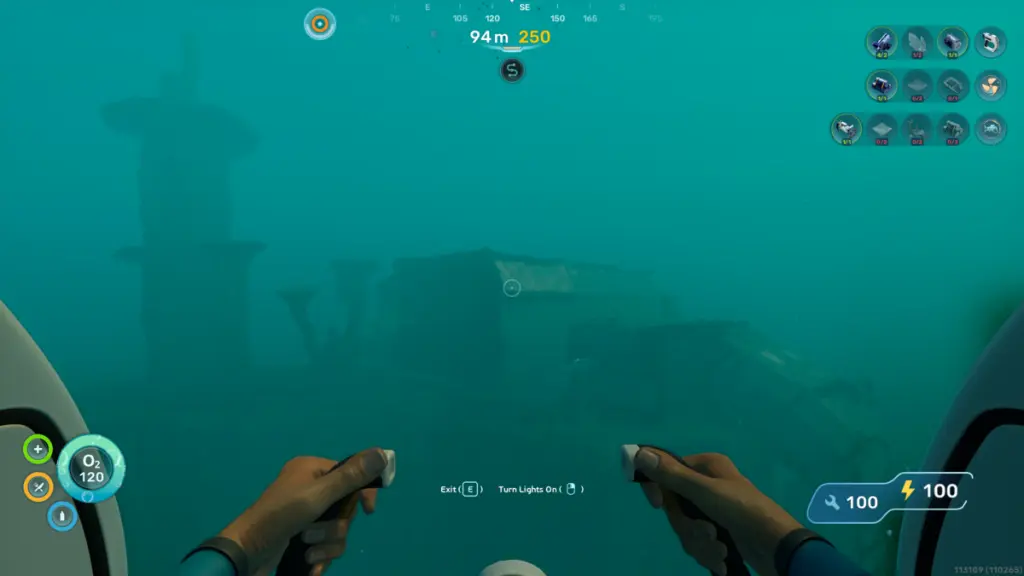 Screenshot by Destructoid Head towards 120 degrees on the compass from the outpost. You'll find the Blackbox - Iso marker that you should use as your guide. Keep a steady depth of 120m and head straight. You'll come across an Alterra starship wreck. Park your Tadpole and head inside using the door on the left.
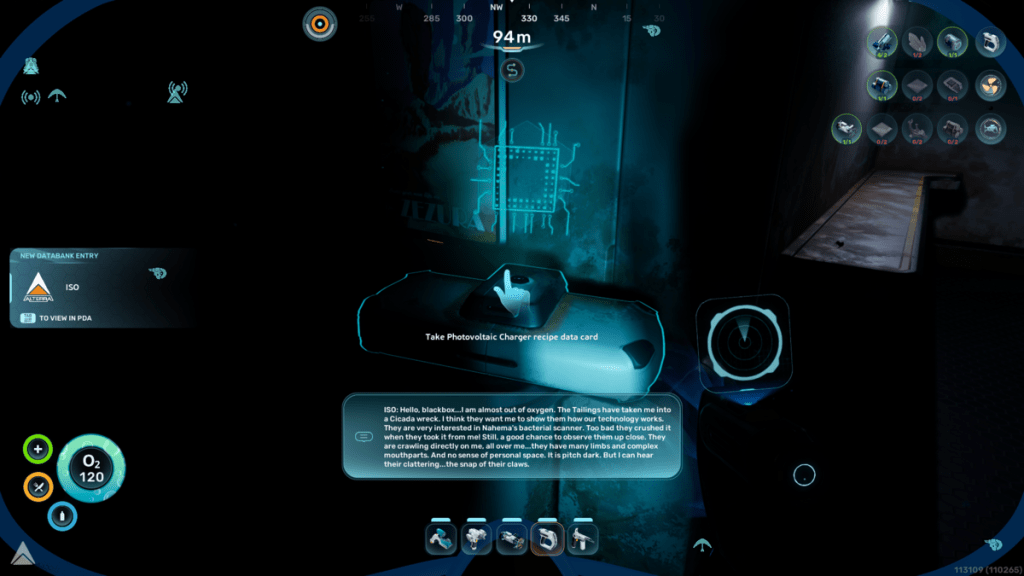 Screenshot by Destructoid Head straight, turn right, and you'll find a broken door. Repair the door, and head inside. Then turn left and go to the next room. Take the door to the left corner, and you'll come across the room with the ISO. The module is diagonally opposite to the dining table that has the ISO on it.
Depth Module Mk. I upgrade location
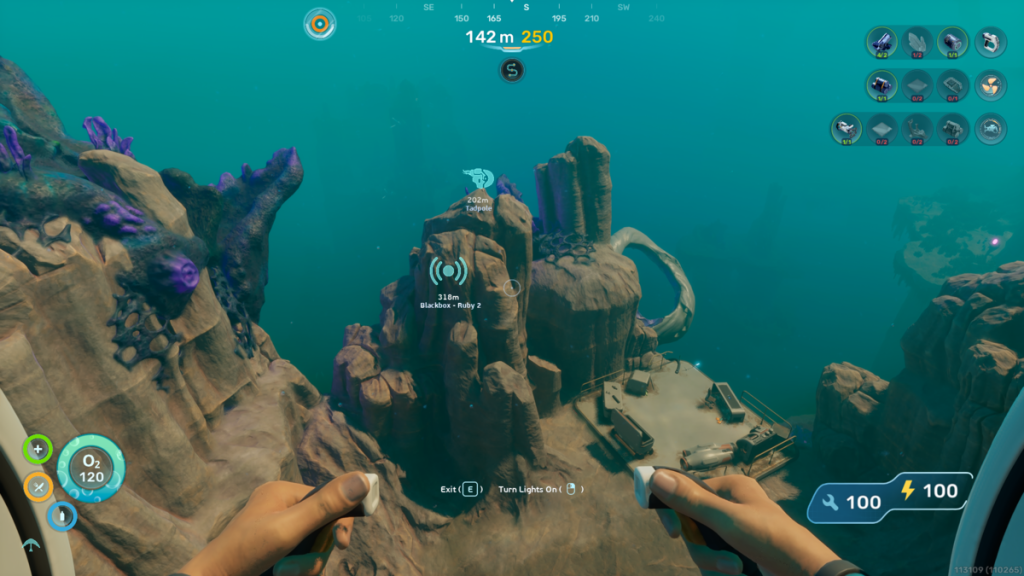 Screenshot by Destructoid Return to the front of the Research Outpost. Aim at 165 degrees on the compass, and you'll find the Blackbox - Ruby 2 pop up on your screen. Head to the spot and reach the bottom layer of the location. You can enter through the broken rocks; I entered through a narrow spot on the left (leave your Tadpole), and you'll find Ruby 2's black box.
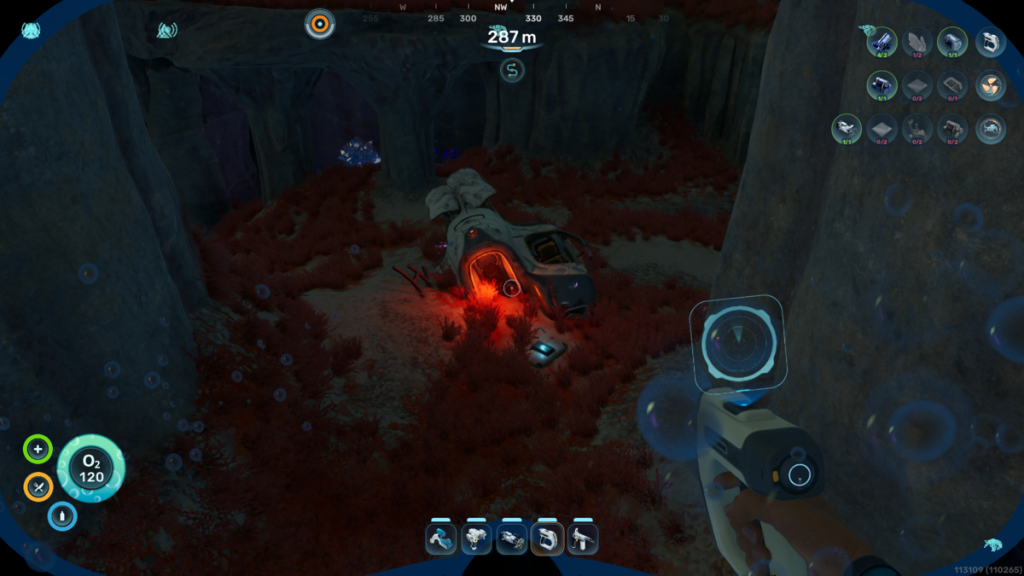 Screenshot by Destructoid You'll also find a broken-down Tadpole, with the Depth Module Mk. 1 beside it.
Haul Chassis upgrade locations
To get the Haul Chassis, you'll need to scan three fragments. The first one is located just by the Depth Module Mk. 1 upgrade. Once done, return to the Research Outpost and head straight targeting between East and 105 degrees on the compass.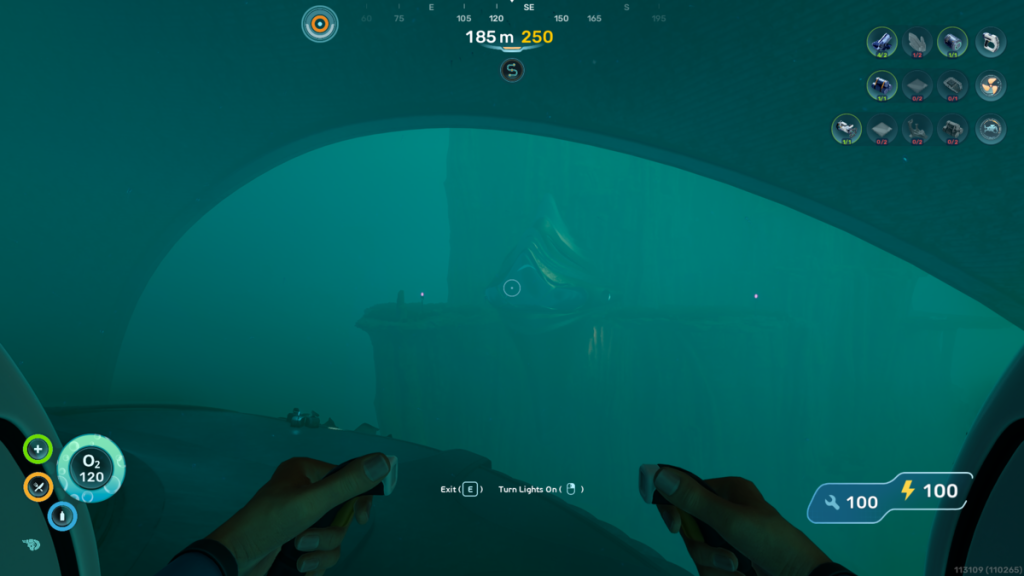 Screenshot by Destructoid Go past the dome of the Power Center (stick strictly to 105 degrees now), and head straight. Keep heading straight, and you'll reach another Alterra shipwreck at about 200m depth.
 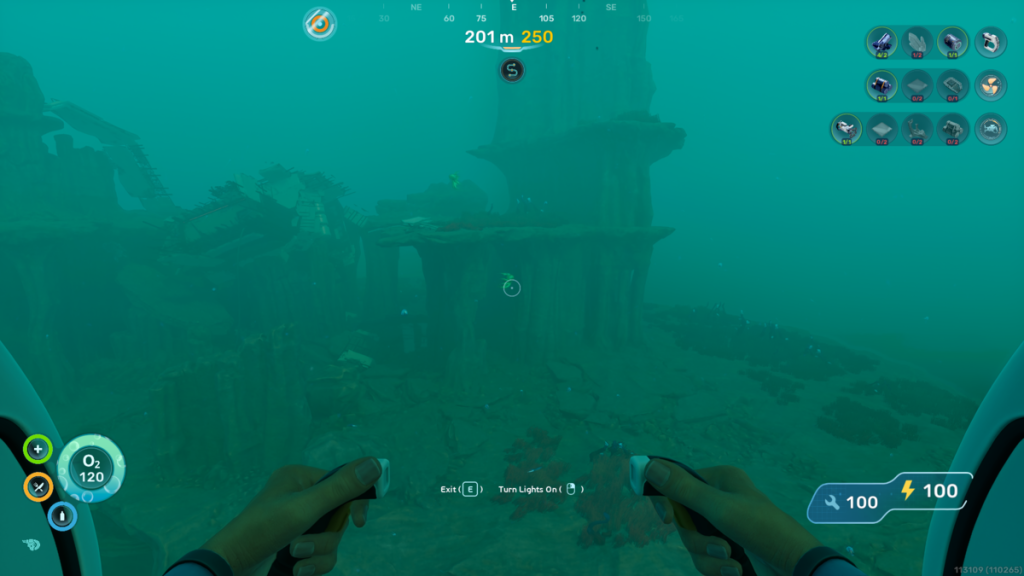 Screenshot by Destructoid The second Haul Chassis part is on a platform to the left.
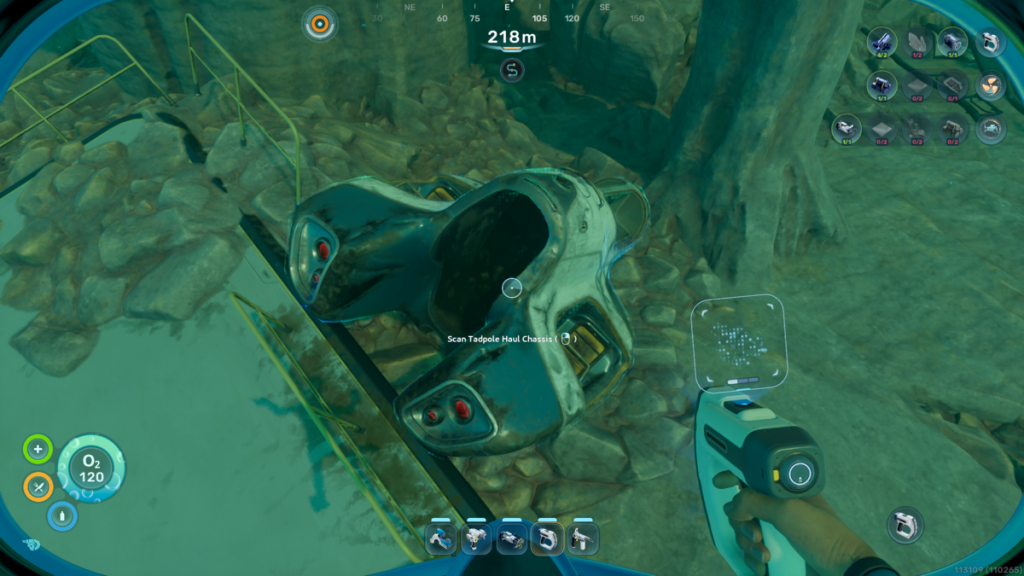 Screenshot by Destructoid To find the final one, you can refer to this guide, which states the location of the final Angel Comb. You'll want to go past the Angel Comb and head straight, following the root until you reach an acidic pool.
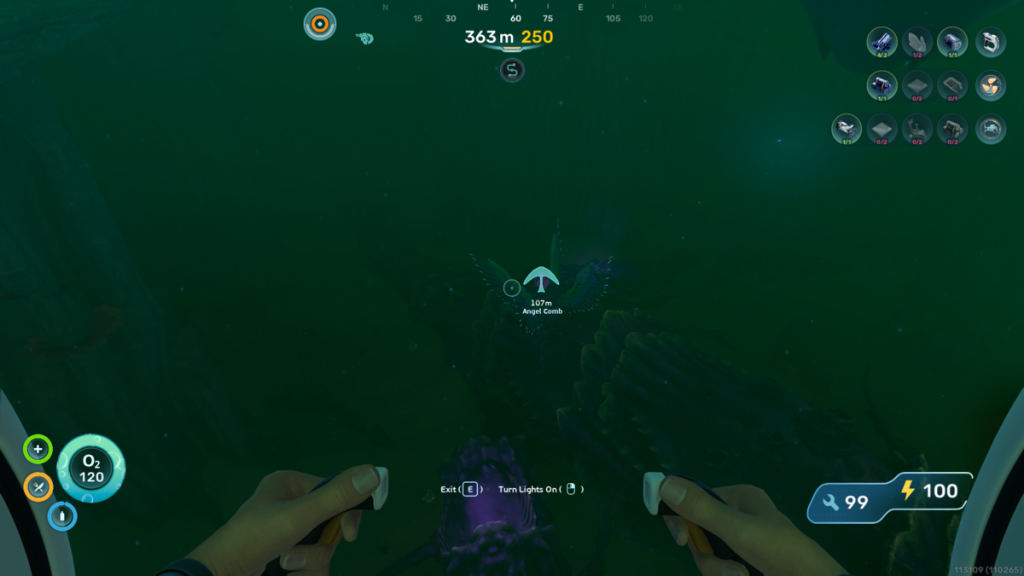 Screenshot by Destructoid Look to your left past the alien structures after entering the pool room, and you'll find your final chassis part.
  Screenshot by Destructoid Complete the scan, and your Tadpole will now be able to equip the Haul Chassis.
The post All Tadpole upgrade locations in Subnautica 2 and how to find them appeared first on Destructoid.
What's Your Reaction?


XINKER - Business and Income Tips
Explore XINKER, the ultimate platform for mastering business strategies, discovering passive income opportunities, and learning success principles. Join a community of thinkers dedicated to achieving financial freedom and entrepreneurial excellence.